
 1 year warranty
Programmable logic controllers (PLCs) offer a reliable, versatile solution for controlling and monitoring industrial machinery, allowing you to automate your operations and reduce the risk of errors or accidents. Schneider Electric is a leading manufacturer of Schneider PLC hardware, offering a range of Schneider PLC models and features to meet the needs of various industrial applications. However, if you're new to PLC programming, incorporating these devices can seem daunting. This guide walks you through the key steps to getting started with Schneider PLC hardware, from choosing the right model to expanding your system as your application grows.
How Do You Choose the Right Schneider PLC Model for Your Application?
The first step in using Schneider PLC hardware is to choose the right model for your specific needs. Schneider Electric offers several Modicon PLC lines suited to different application scales and performance requirements.
The confirmed Modicon Schneider PLC models available through PLC Direct include:
-
Modicon M221: Compact logic controller for hardwired architectures, with up to 40 I/O points, integrated Ethernet, RS485/RS232 serial links, and USB programming port. Programmed using EcoStruxure Machine Expert Basic. Suited to simple machine control applications.
-
Modicon M238: Logic controller with expanded I/O capacity and Modicon TM2 expansion module support, including analog input modules covering voltage, current, and temperature probe inputs.
-
Modicon M241: High-performance compact machine controller with 8MB program memory, 128MB built-in flash, integrated Ethernet, dual serial links, and SD card support up to 16GB. Designed for speed and position control applications. Programmed using EcoStruxure Machine Expert.
To select the right Schneider PLC model for your application, consider the number of I/O points needed, the type of signals you will control (digital or analog), and the required communication protocols. Consult the specifications sheet and user manual of each model to compare their features and capabilities.
How Do You Wire I/O Modules on Schneider PLC Hardware?
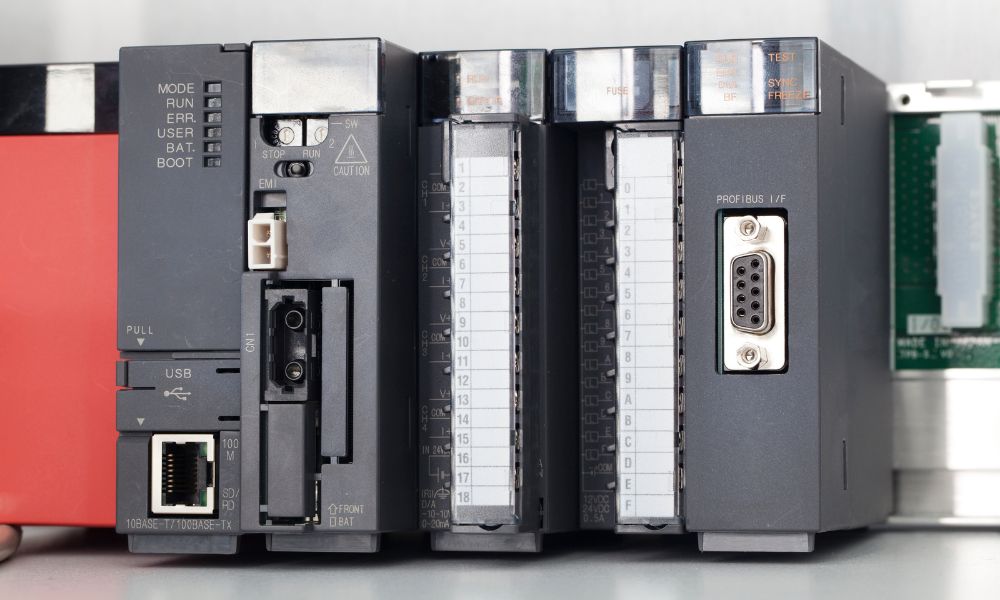
Once you have your Schneider PLC hardware, the next step is to wire the input/output modules to the device. The I/O modules serve as the interface between the PLC and the external signals you want to control or monitor, such as sensors, actuators, or switches.
To wire the I/O modules correctly, follow the Schneider-provided wiring diagrams and instructions. Digital signals are typically connected using screw terminals, while analog signals may require additional calibration and configuration. Ensure that the wiring is secure and insulated to prevent shorts or other electrical hazards. You can also use diagnostic tools to test the signals before adding them to your PLC program.
How Do You Connect Schneider PLC Hardware to Other Devices and Networks?
The next step in getting started with Schneider PLC hardware is to connect it to other devices and communication networks. Depending on your application, you might need to connect your PLC to a human-machine interface, a supervisory control and data acquisition system, or other devices via Ethernet, serial, or USB ports.
You will need to configure the network settings, such as the IP address, subnet mask, and gateway, to establish communication between your PLC and other devices. You can then use programming software to set up the protocol and messaging parameters, ensuring that the signals transmit correctly.
It is essential that you thoroughly test your communication setup, using diagnostic tools or network analyzers to identify and resolve any issues. You can also use security measures such as firewalls or virtual private networks (VPNs) to protect your PLC and data from unauthorized access.
What Software Is Used for Schneider PLC Programming?
Schneider PLC programming is handled through EcoStruxure Machine Expert, Schneider's current integrated engineering environment for the Modicon M241, M251, M262, and related platforms. For the Modicon M221, the equivalent environment is EcoStruxure Machine Expert Basic. Both provide graphical interfaces for designing ladder diagrams, function blocks, and other IEC 61131-3 programming languages.
To get started, configure the communication port and device driver settings so the software can communicate with your PLC. Once connected, create a new project, add the necessary I/O modules and signals, and design your logic program. You can test it using the simulation mode before downloading it to your PLC.
How Do You Implement Your First Schneider PLC Program?
Creating a basic program is crucial to familiarizing yourself with ladder logic and running a simple output. Ladder logic is a graphical programming language that allows you to visually represent your control system commands, and it is one of the core Schneider PLC programming languages supported in EcoStruxure Machine Expert.
Begin by setting up your input and output points, then write your ladder logic code. You can then download the program to your PLC and start it to test the output signal.
How Do You Monitor and Debug Your Schneider PLC Program?
Once you have your first program up and running, it’s time to start monitoring your I/O tags. I/O tags are variables that correspond to the inputs and outputs of your control system. You can use Schneider’s watch window and forcing features to test inputs and outputs as you develop your control program.
The watch window enables you to view the values of your input and output tags in real time, while the forcing feature allows you to manually input values to your tags. For more complex programs, EcoStruxure Machine Expert also provides breakpoints, single-step mode, and diagnostic functions. Breakpoints allow you to halt program execution at a specific point in your code, while single-step mode enables you to execute your program one instruction at a time. Diagnostic functions help you identify and resolve errors such as missing or mismatched tags.
How Do You Expand Your Schneider PLC System as Your Application Grows?
As your application grows, you may need to add more I/O points, communication cards, and other expansion modules to your Schneider PLC hardware. Schneider offers a wide range of expansion options, including analog I/O modules, high-speed counter modules, and Ethernet communication cards. The Modicon TM2 and TM3 expansion module ranges are confirmed available through PLC Direct for use with the M221, M238, M241, and M251 platforms.
To add a new module, plug it into the expansion slot of your PLC and configure it using EcoStruxure Machine Expert. Once added, you can integrate the new modules into your existing control system through the programming environment.
Using Schneider PLC hardware in your facilities can help you optimize industrial processes and improve efficiency and productivity. By following the above steps, you can create a reliable, secure, and user-friendly automation system. But before you can start the implementation process, you need a quality PLC device. PLC Direct stocks surplus sealed, refurbished, and used Schneider Modicon hardware across the M221, M238, M241, M251, M340, M580, and Quantum platforms, all carrying a 1-year PLC Direct warranty. Reach out to us today to learn more about the products we have available.